Mutation Testing in Java with PITest
Introduction
Testing is a critical aspect of software development, and we all know how challenging it can be to determine the effectiveness of test cases in detecting faults or defects in a program. Testing usually involve running a series of test cases on a program’s code to check if the code behaves as expected. However, these tests may not always be sufficient to catch all possible current or even future defects. This is where mutation testing comes in.
Mutation testing is a technique that involves introducing small changes (mutations) to the codebase to see if the existing test cases can detect these changes. The goal of mutation testing is to measure the quality of a set of test cases by determining their effectiveness in detecting faults or defects that are present or that can be introduced in the program. If the test cases can detect the mutations, then they are considered effective, and the program is considered to have a high level of fault tolerance. If the test cases fail to detect the mutations, then they are considered ineffective, and the program may need further tests.
In this post, we will learn how to use PITest, a mutation testing library for Java, to measure the quality of our test cases.
Table Of Contents
Example
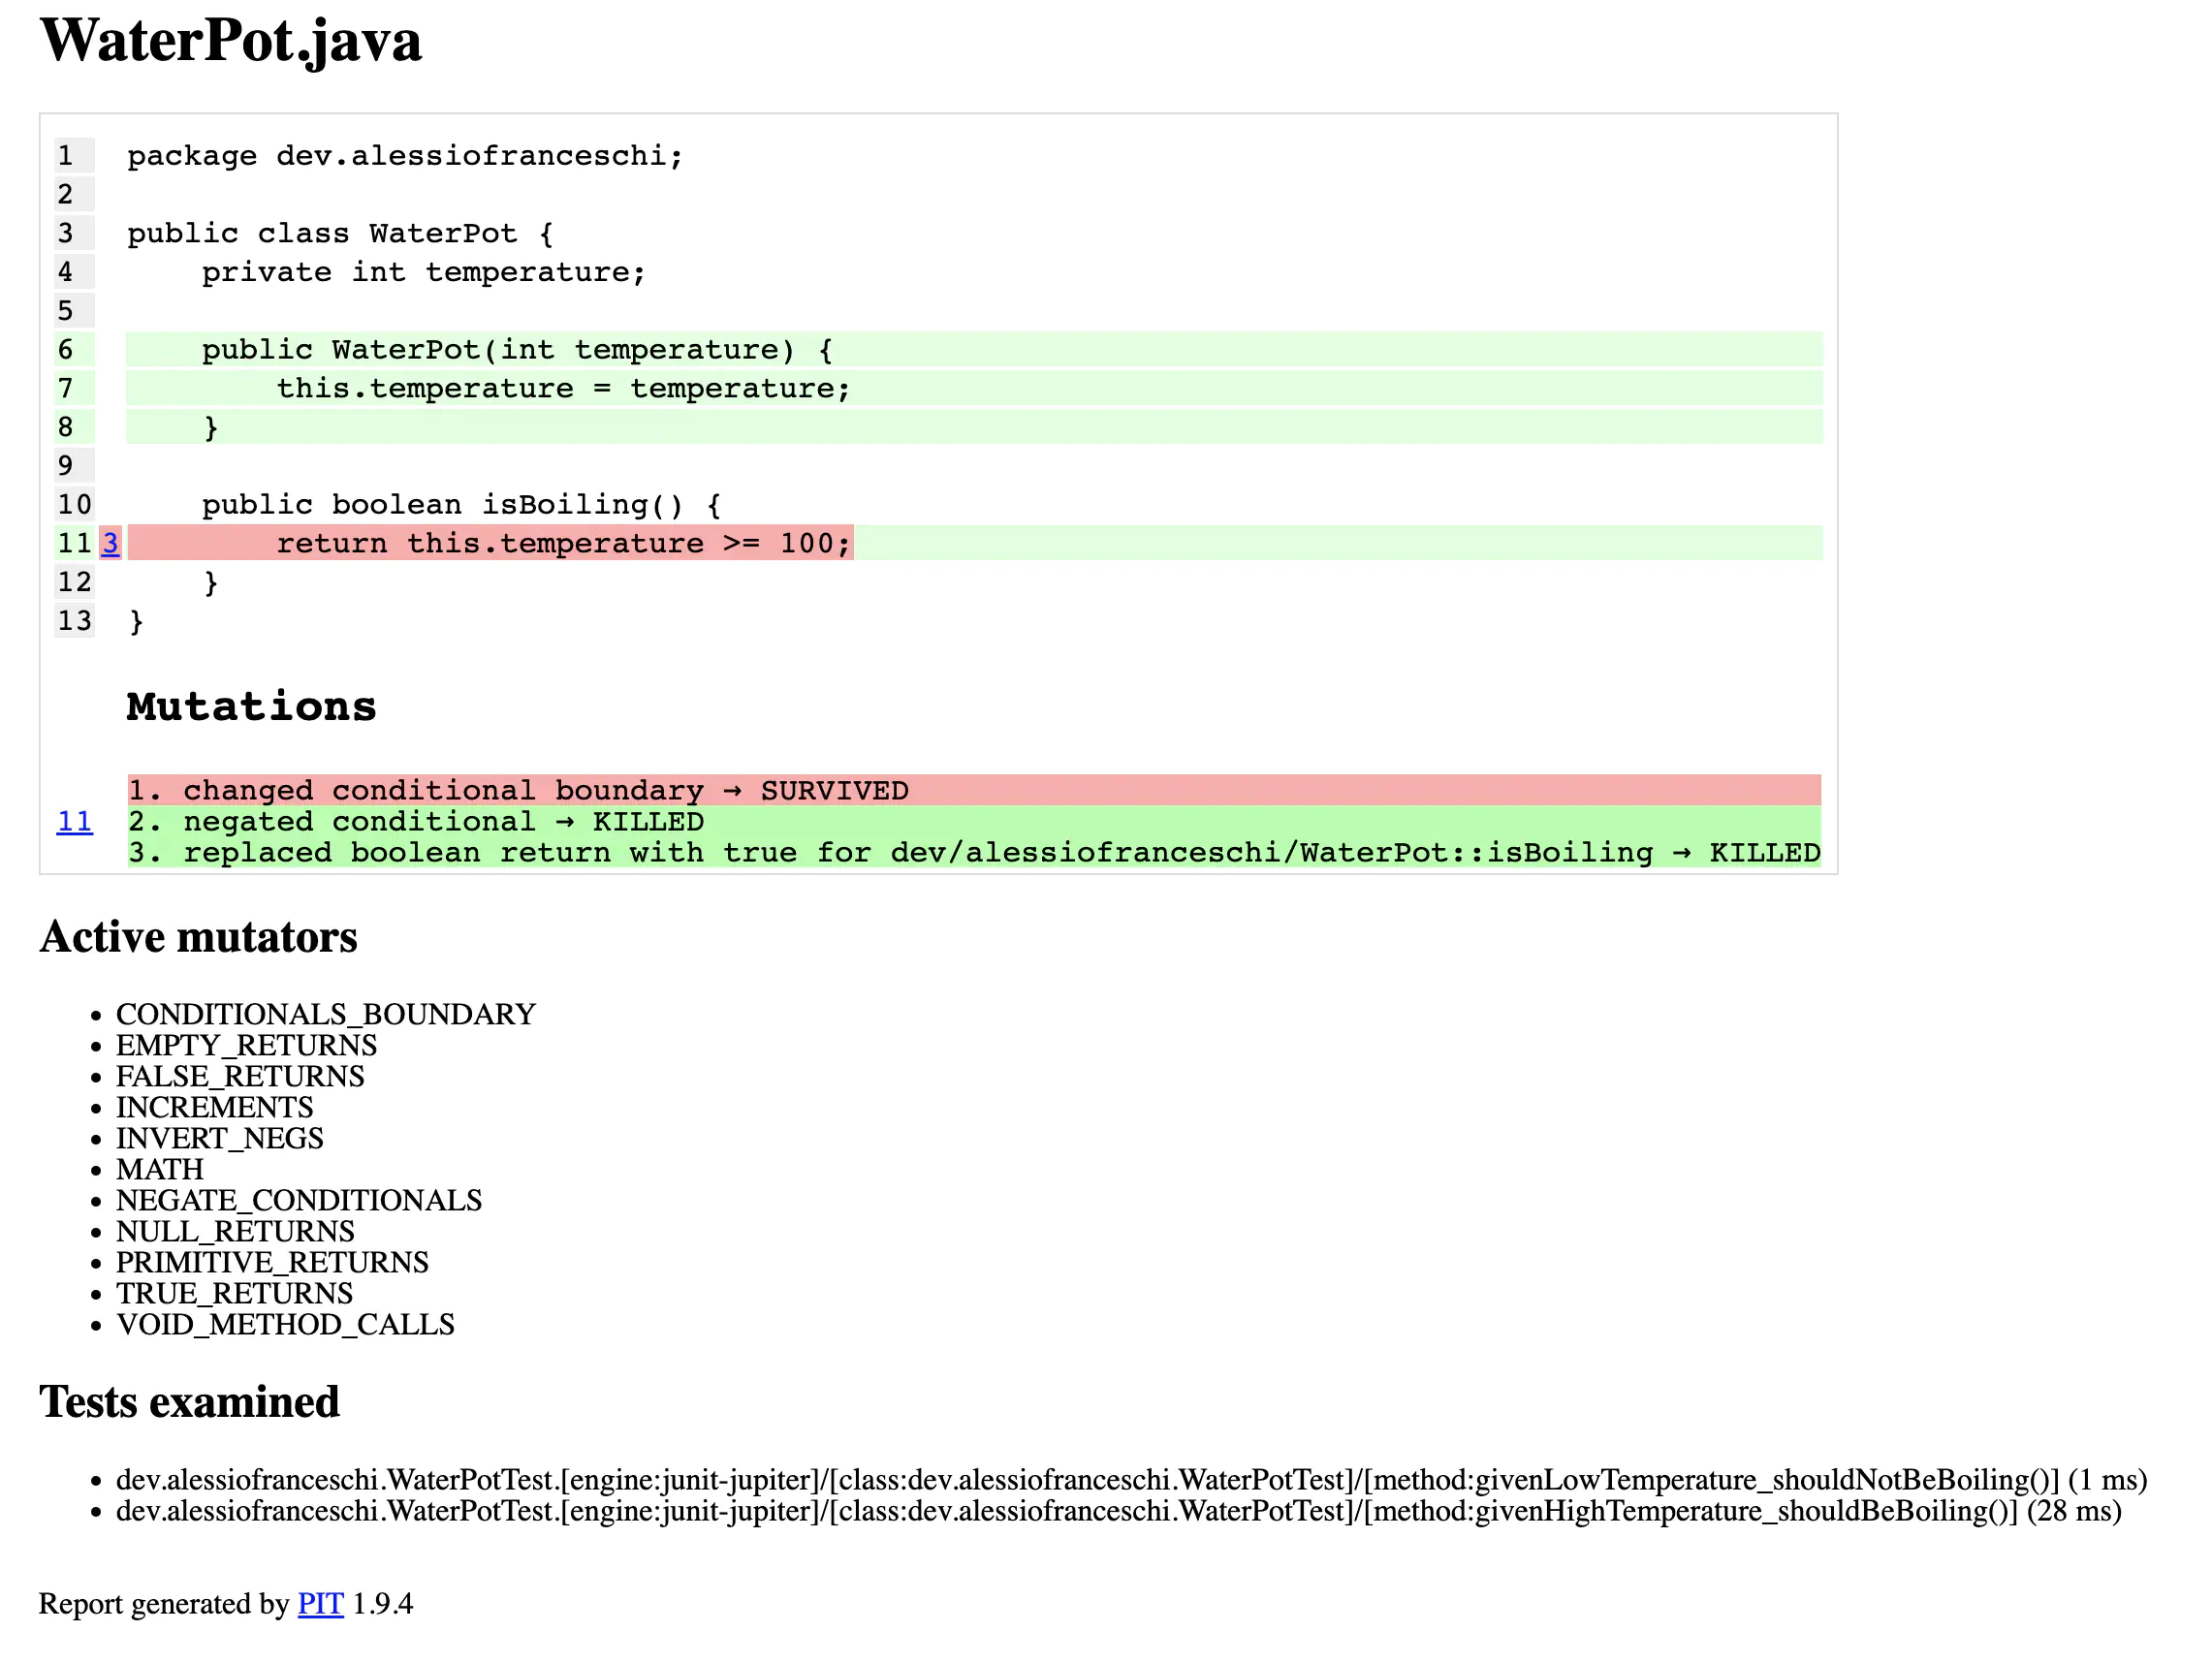
Let’s start with a simple Java class that checks whether water in a pot is boiling:
public class WaterPot {
    private int temperature;

    public WaterPot(int temperature) {
        this.temperature = temperature;
    }

    public boolean isBoiling() {
        return this.temperature >= 100;
    }
}
We can write some test cases to check if the class behaves as expected:
class WaterPotTest {

    @Test
    void givenHighTemperature_shouldBeBoiling() {
        WaterPot waterPot = new WaterPot(1000);

        assertTrue(waterPot.isBoiling());
    }

    @Test
    void givenLowTemperature_shouldNotBeBoiling() {
        WaterPot waterPot = new WaterPot(10);

        assertFalse(waterPot.isBoiling());
    }
}
We can run these tests and check the code coverage. The coverage report might say that the code is fully covered, and all tests pass. However, what if we make a small change to the code, such as modifying the >= operator in the isBoiling() method to >?
public class WaterPot {
    private int temperature;

    public WaterPot(int temperature) {
        this.temperature = temperature;
    }

    public boolean isBoiling() {
        return this.temperature > 100;
    }
}
If we run the tests again, they will still pass, however we have introduced a bug that might go unnoticed. This is where mutation testing comes in. We can use PITest to automatically introduce these small changes or mutations and see if our existing test cases can detect them.
Using PITest
PIT is a state of the art mutation testing system, providing gold standard test coverage for Java and the jvm. It’s fast, scalable and integrates with modern test and build tooling.
Installation
To install PITest, you can follow the instructions on the quickstart page. If you are using Gradle like me, you can add the following lines to your build.gradle file:
plugins {
    ...
    id 'info.solidsoft.pitest' version '1.9.0'
}

...

pitest {
    junit5PluginVersion = '1.0.0'
    jvmArgs = ['-Xmx1024m']
    exportLineCoverage = true
    targetClasses = ["dev.alessiofranceschi.*"]
}
Running PITest
To run PITest, we need to execute the following command in the terminal:
gradle pitest
This will generate a report with the mutation coverage metrics for the project. We can customize the configuration of the mutation testing process by adding properties to the build.gradle file, under the pitest block.
For example, we can specify the target classes for mutation testing using the targetClasses property (a must-have for most projects):
pitest {
    targetClasses = ["dev.alessiofranceschi.project.service.*"]
}
We can also set the level of mutation testing using the mutators property. The default mutators are ALL and STRONGER, which mutate all Java operators and a subset of Java operators, respectively. We can specify the mutators to use as follows:
pitest {
    mutators = ["CONDITIONALS_BOUNDARY"]
}
Interpreting Results
Once PITest is done running, it will output the results in the console. The results will also be stored in build/reports/pitest in HTML format. We can open the index.html file in a web browser to navigate the test results in a more readable way.
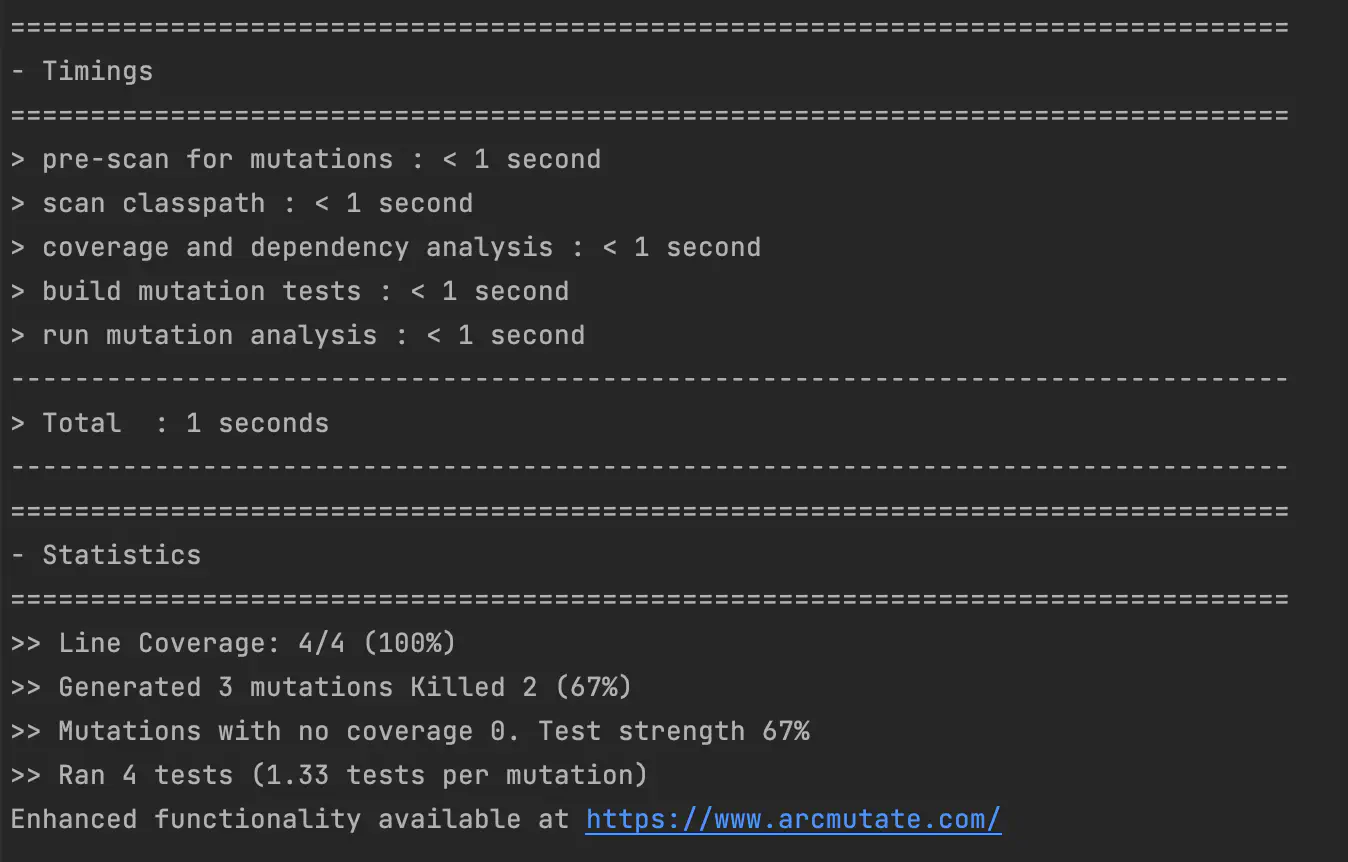
Once opened you are going to see 3 metrics – line coverage, mutation coverage and test strength.
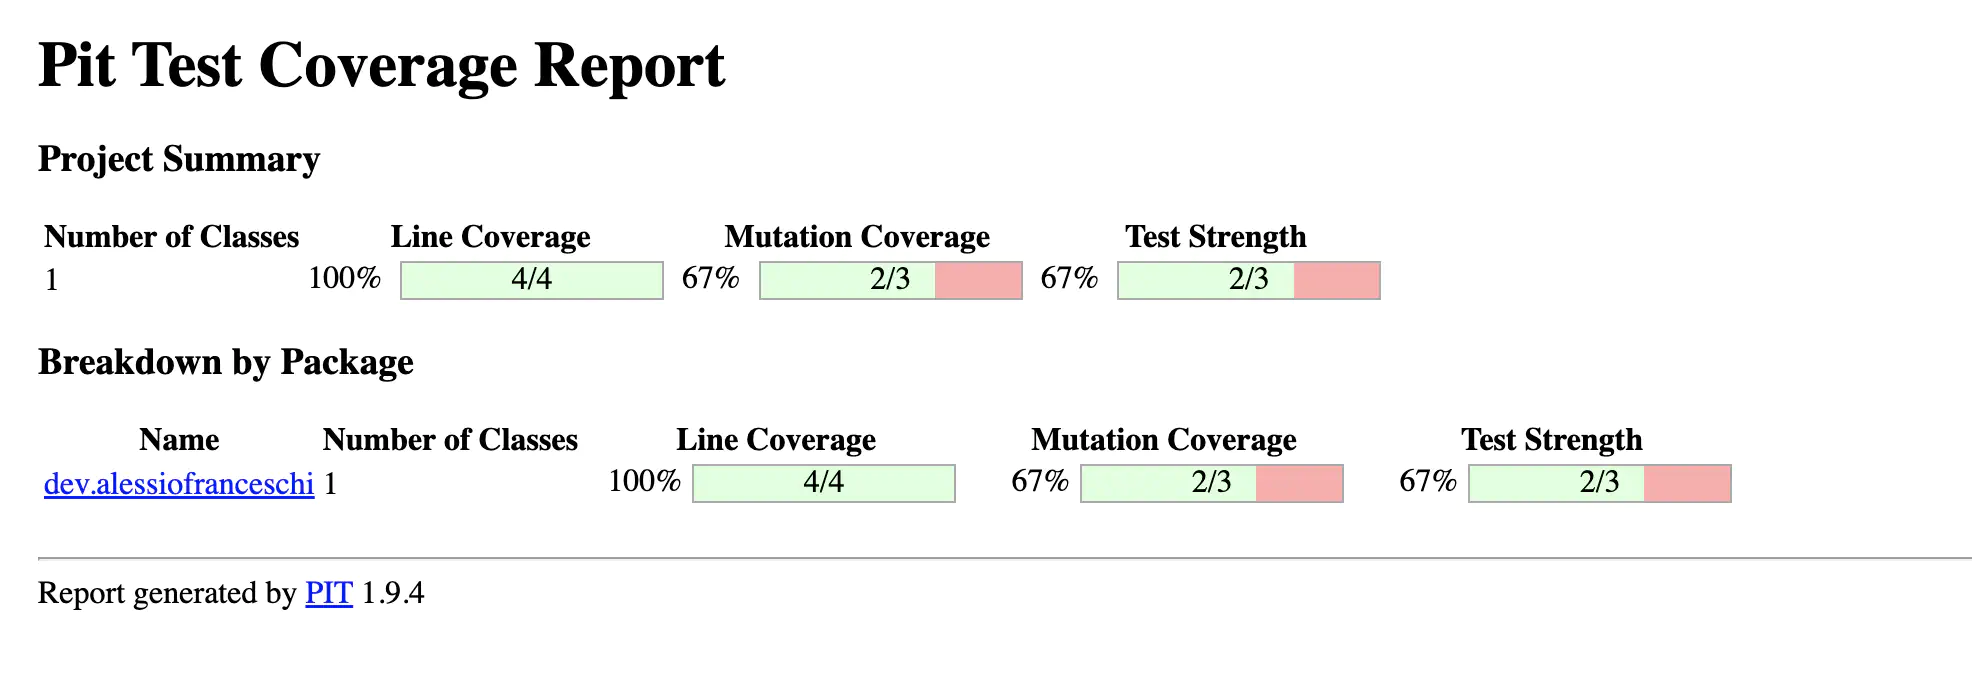
Line Coverage
Line coverage is the measure of how many lines of code are actually covered by the tests. This is a basic metric that can be used to see if we have missed any test.
Mutation Coverage
Mutation coverage measures how many mutants were killed out of all the mutants created. A mutant is considered killed if at least one test case fails when executed against the mutant. We can see the mutation coverage for each class in the project in the Classes tab of the PITest HTML report.
When interpreting the mutation coverage metric, we should aim for a high percentage of mutants killed. A high percentage indicates that our tests are effective at detecting faults or defects in the program. On the other hand, a low percentage indicates that our tests may need further improvement.
Test Strength
Test strength is the score of how many mutants were killed out of all the mutants that were created, excluding those that were not tested at all. This means that if a mutant survives because the method it mutated isn’t tested, it won’t count towards this metric.
Potential Issues
Mutation testing is a highly resource-intensive operation that may take several hours to complete. Running such an extensive number of tests can potentially cause several issues.
Random Test Failures
After executing the test suite, if all tests pass and the PIT tool is run, there may be cases where it fails with the following error message:
* tests did not pass without mutation when calculating line coverage. Mutation testing requires a green suite.
This means that some non-mutated tests may have failed. In my case this was caused by too many open connections to the database, which can cause Postgres to reject new connections, leading to test failures.
Long Runtime
Executing all tests may take several hours to complete. To improve efficiency, it’s recommended to focus on a single package at a time rather than launching a large number of mutations on the entire project.
pitest {
	...
  targetClasses = ['dev.alessiofranceschi.myproject.service.*']
}
Conclusion
Mutation testing is a useful technique for evaluating the quality of our tests. It helps us identify weaknesses in our tests by measuring their effectiveness in detecting faults or defects in the program. PITest is a powerful mutation testing library for Java that can help us improve the quality of our tests. By interpreting the mutation coverage metrics generated by PITest, we can identify areas that need further testing or improvement.
Further Readings
Feedback
Got any comment, opinion or correction? Please contact me via email (can be found in my GitHub profile) or via Mastodon.